There have
been quite a few changes recently to feature sets and licensing of Microsoft
Teams Phones. This post digs into the details of the various phone modes and
licensing options in 2022. Note, this post is being released just after Ignite 2022 when it was announced that the Common Area Phone licence is being renamed to the Teams Shared Device licence in "a couple of months". In this post I am going to be sticking with the Common Area Phone licence name until we have further information on any new capabilities that will be included with the Teams Shared Device licence for phones.
User Interface Modes
There has been three user interface available on Teams phone devices for a while now, which allows you to tailor the experience to different scenarios. In the
past these required PowerShell configuration, however, the Teams will now try to auto-magically choose the interface for the phone based on
the licence the user account has been assigned.
For
regular users logging in with E3-E5 licensing, the system assumes that the User Mode interface should be used. When a Common Area Phone licence (announced at Ignite 2022 to be changing names to the Teams Shared Device licence) is assigned the Common Area Phone interface will be selected by default.
Lastly, when a Teams Meeting Room licence is assigned to the phone, the Meeting Room interface will be shown. When testing
this I have found that in most cases the licence based auto assignment works, but for some reason this sometimes doesn't work and the phone falls back to User Mode.
As a result, I would still recommend using the PowerShell command to select the interface mode for more consistent outcomes.
There are also now two different versions of the Common Area Phone mode. The original mode is now called Common Area Phone Basic and an extra special Common Area Phone Premium mode. The premium mode take into account a bunch of new capabilities in the updated Common Area Phone licence updates that came in mid-2022. Without further ado - let's have a more detailed look at the modes...
Common Area Phone Mode
(Basic)
Common
Area Phone (Basic) mode is used for devices that have their own user accounts and are
(usually) assigned a Common Area Phone licence. The default Common Area Phone
user interface has a basic keypad layout for dialing phone numbers. All the other bells and whistles like calendar, voicemail, etc at nowhere to be seen in this interface. Below is an
example of the default Common Area Phone user interface:
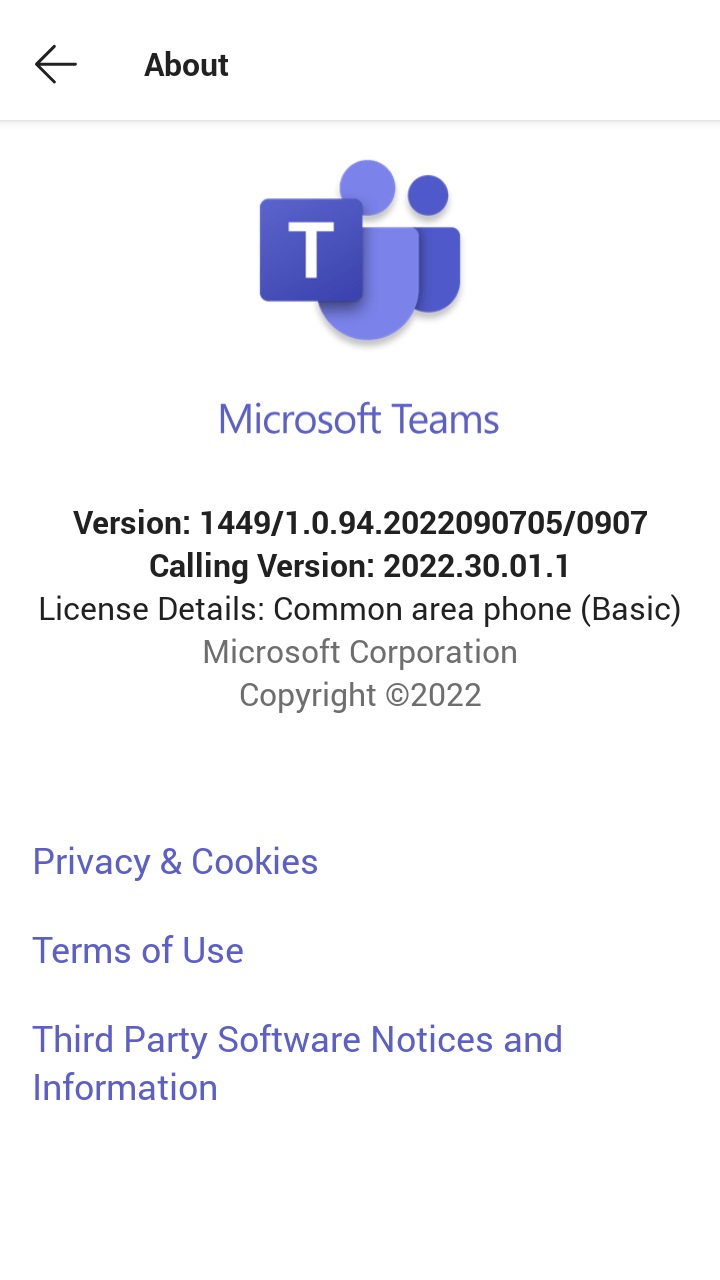
Note: The About screen on the phone will show Common Area Phone (Basic) when you're in this mode.
For
Common Area Phone Basic mode there is another setting where you can turn on or
off the user search capabilities on the device. You may want to use this if you
have a phone sitting in a lobby of a building and you don’t want people to be
able to find out people that work there using the search function.
 |
| SearchOnCommonAreaPhoneMode = Enabled |
It is
recommended that if you want to use a phone in Common Area Mode that you create
a Teams IP Phone Policy and assign it to the Common Area Phone account. A Common Area Phone account should be a regular user account. You should not be using room accounts for these devices. Here’s an example of setting up the Phone Policy:
New-CsTeamsIPPhonePolicy
-Identity CommonAreaPhone -SignInMode CommonAreaPhoneSignin
Grant-CsTeamsIPPhonePolicy
–Identity 'testuser@contoso.com' –PolicyName ‘CommonAreaPhone’
Note: The quickest way to get this change to take effect is to sign the phone out and back in again.
Common Area Phone Mode
(Premium)
Since mid-2022
(Teams app version 1449/1.0.94.2022061702) the licensing for Common Area
devices was expanded to include some new features (Voicemail, Call Forward
settings, Call Park, Call Queues, Auto Attendants, Intune enrollment into
Endpoint Manager). As you can probably imagine, the very basic default Common
Area Phone user interface is not going to give you the flexibility to use all
these features. So Microsoft went for a user interface that looks
mostly like the User Mode interface, only without the meetings section.
The Common Area Phone Advanced Calling interface looks like this:
Note: In the about page you will be able to tell that it's in this mode because it says "License Details: Common Area Phone (Premium)".These devices are still geared towards being an admin controlled device, so if you want to access the Call Forwarding settings on the device you need to access the Admin level of settings in the phone - for example:
Note: Wow, cool animated GIF… If you want to make your own, download my Teams Phone Screen Capture Tool script: https://www.myteamslab.com/2020/10/teams-phone-screen-capture-tool.html
The new
features are called Advanced Calling features and are controlled by a setting
within Configuration Profiles in Device Configuration in the Teams Admin
Portal. Personally, I would have preferred this setting be a Teams IP Phone
Policy rather than an individual device profile… however, Microsoft sometimes
enjoy making things a little more complicated.
To enable a device for Common Area Advanced Calling features you need to create a new Configuration Policy and turn on the "Advanced Calling" Setting:
After this you have to assign the Configuration Policy to the devices that you want to use it:
After doing this you need to wait a while for the configuration policy to be pushed to the phone. You will have to have the phone registered to the cloud and signed in for this to happen.
As for
the Common Area Phone Basic mode, it is recommended that you create a Teams IP Phone
Policy and assign it to the user account. Here’s an example:
New-CsTeamsIPPhonePolicy
-Identity CommonAreaPhone -SignInMode CommonAreaPhoneSignin
Grant-CsTeamsIPPhonePolicy
–Identity 'testuseradvanced@contoso.com' –PolicyName ‘CommonAreaPhone’
Note: The quickest way to get this change to take effect is to sign the phone out and back in again.
Meeting Room Mode
Meeting
Room mode is for devices that you want to put in Meeting Rooms (Surprise!). Most commonly this would be for a conference room style phone, however, it could also be for small rooms where you might have a desk phone running the meeting room interface.
The Meeting
mode was recently updated to have a new look which is more in line with the other
Microsoft Teams Meeting Room device interfaces. This is great when you have a
combination of video meeting rooms and basic conference phone rooms in your organisation. The similar
interface allows for a consistent user experience for booking the rooms in both
cases and having a one-touch join button can make meeting more likely to start on time and be much more
streamlined.
Here is
an example of the new Meeting Room interface:
When
creating Meeting Room accounts it’s usually a better idea to create the phone account
as a Room account rather than a User account. This gives you the option to have
the room auto accept meeting invites and be shown as a room in Teams meeting
invites. Here is an example of creating the room account:
Step 1: Add A Room Resource In Microsoft 365 Admin Centre. Click the "Add resource" button:
Step 2a: Fill in the details of the account you will be creating:
Step 2b: Optionally you can edit the booking options:
Step 2c: Ensure
that you have “Auto accept meeting requests” ticked for your device so it will
display the meetings properly:
Step 3a: Open the User Information pane in Microsoft 365 Admin Centre:
Step 3b: In the Licenses and Apps tab, assign a Microsoft Teams Room Basic (I would recommend also adding a Teams Phone licence for PSTN calling capabilities) or Teams Room Pro license:
Step 3c: Reset the account Password by clicking on the Reset Password button at the top this panel. This will allow you to sign into the Room account:
After setting up the account you can also force the Meeting Room mode by run the
following Team Module PowerShell commands:
New-CsTeamsIPPhonePolicy
-Identity MeetingRoomPhone -SignInMode MeetingSignIn
Grant-CsTeamsIPPhonePolicy
–Identity 'testuser@contoso.com' –PolicyName ‘MeetingRoomPhone’
Note: The quickest way to get this change to take effect is to sign the phone out and back in again.
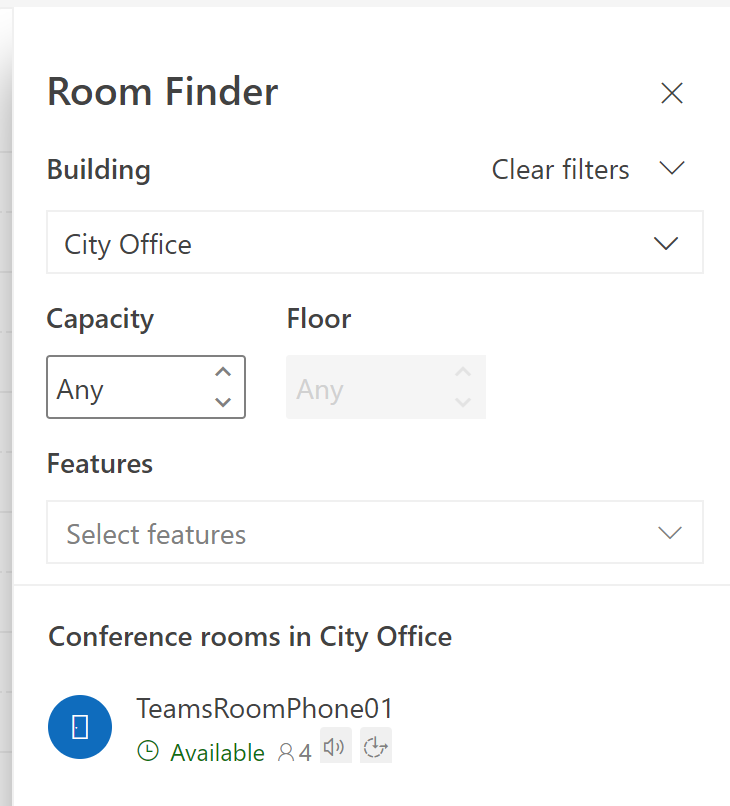
As a
bonus you can also add the Teams room to the list of locations that show up in
the Teams client meeting invite screen:
How to create
a Room Location (Distribution Group Room List):
Connect-ExchangeOnline
New-DistributionGroup
-Name “City Office” -RoomList
#Add the affected
room mailbox to that distribution group
Add-DistributionGroupMember
-Identity “City Office” -Member TeamsRoomPhone01@contoso.com
As an
additional super bonus, you can help to indicate that this is an Audio only
room in Outlook when scheduling the meeting by configuring Place information
for the room (see the little Audio symbol, wheelchair symbol and room capacity value. Subtle but useful).
Here's some example PowerShell for doing this:
Set-Place -identity
TeamsRoomPhone01@M365x52543986.onmicrosoft.com -IsWheelChairAccessible $true
-AudioDeviceName "Poly C60 Conference Phone" -Capacity 4 -Building “City
Office”
User Mode
User Mode
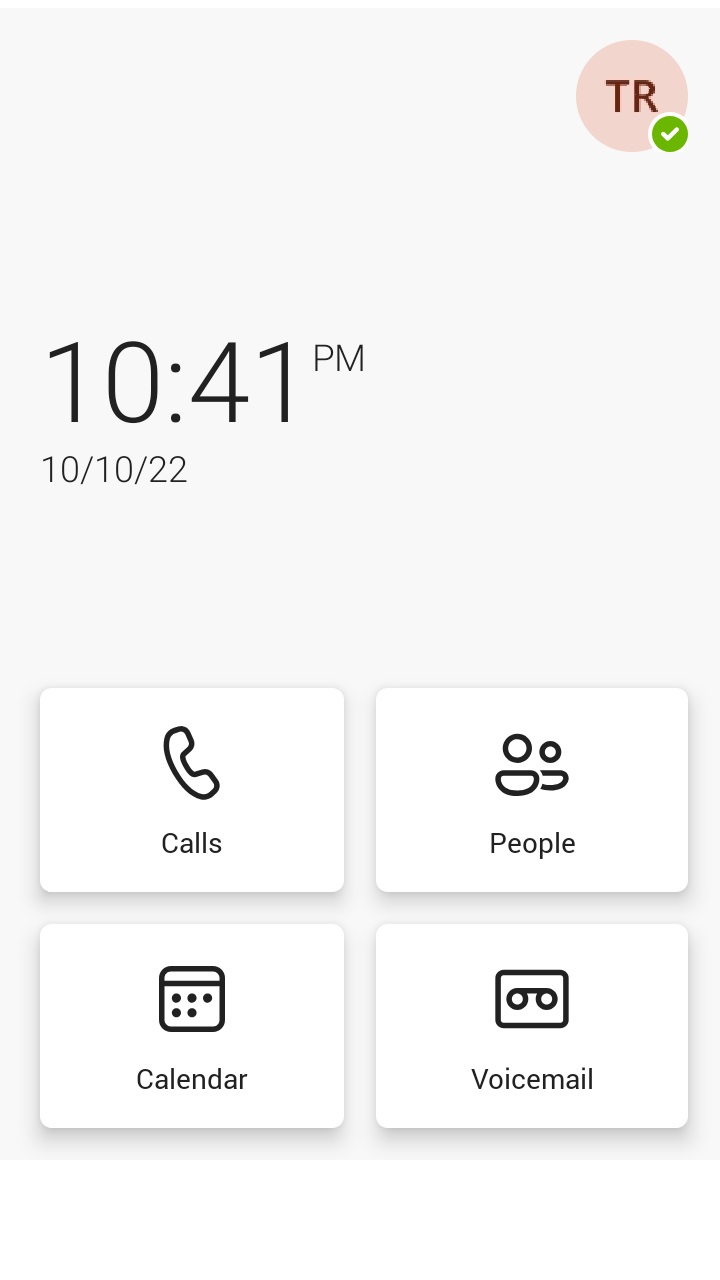
is the mode that any regular user that signs into a Teams Phone will see. It has the full suite of features available including Calls, Calendar, Voicemail, People, etc. Here is an example of the User mode interface:
Usually
you shouldn’t have to set Teams IP Phone policy to achieve user mode. By
default, when a user has E3-E5 licencing SKUs the phone will default to this
mode (unless you have the IP Phone Policy set to one of the other modes for the user). If you want to force User Mode, you can do this with the following
PowerShell commands:
New-CsTeamsIPPhonePolicy
-Identity UserPhone -SignInMode UserSignIn
Grant-CsTeamsIPPhonePolicy
–Identity 'testuser@contoso.com' –PolicyName ‘UserPhone’
Note: The quickest way to get this change to take effect is to sign the phone out and back in again.
Licencing Microsoft Teams
Phones
As
previously mentioned, the licensing of Teams Phones can control what the
default interface shown on the phone will look like. However, it begs the
question: if you do choose to override the default interface can you choose any
of the UI modes with any licence combination?
Firstly, in all cases you need to ensure that your phone software is up to date. The testing for this post was with version 1449/1.0.94.2022090705 of the Teams Phone App. There have been a few iterations of the way licensing works on the phones, so older versions may behave differently. I've also found that when you do a full config reset on a phone it will actually drop the Teams Phone version back to the version that shipped with the base firmware. After doing a config reset on the phone you will likely have to upgrade the Teams Phone App again - so be sure to check this.
After
extensively searching the Internet, I found a docs page that does the bare minimum to describe what happens when you use Teams IP Phone Policy to override the license based automatic
configuration: https://learn.microsoft.com/en-us/microsoftteams/devices/teams-android-devices-user-interface
The important
note on this page being:
"The
license assigned to the user account must have at least the same license
entitlements as the desired user interface. The Common Area Phone licence allows the Common Area phone user interface. The meeting room license allows
meeting room and common area phone user interfaces. An E3 or E5 license supports
all sign-in modes."
Note: This statement doesn't include E1 licensing. E1 only has Plan 1 Exchange licensing, and doesn't include Voicemail - which may be the reason for this omission..? It has been left out of this support statement, so use E1 at your own risk...
I have created the table below to try to
give you a quick idea of the options for licensing Team Phones for the various
modes (including some important Add-On licences):
|
Base Licence
|
Supported Interface Modes
|
Teams Phone (Direct Routing / Operator Connect)
|
Conditional Access
|
Intune
|
Calling Plans (Microsoft PSTN, i.e. Not Direct Routing)
|
|
Common Area Phone Licence
|
Common
Area Phone (Basic / Premium)
|
Included
|
Included
|
Included
|
Add-On
Required
|
|
Teams
Room Basic
|
Meeting
Mode,
Common
Area Mode
|
Teams
Phone Add-On
|
Add-On
Required
|
Add On
Required
|
Add-On
Required
|
|
Teams
Room Pro
|
Meeting
Mode,
Common
Area Mode
|
Included
|
Included
|
Included
|
Add-On
Required
|
|
M365 E3
|
User Mode, Meeting
Mode,
Common
Area Mode
|
Teams
Phone Add-On
|
Included
|
Included
|
Add-On
Required
|
|
M365
E5
|
User Mode, Meeting Mode, Common Area Mode
|
Included
|
Included
|
Included
|
Add-On
Required
|
|
Office
365 E3
|
User Mode, Meeting Mode, Common Area Mode
|
Teams
Phone Add-On
|
Add-On
Required
|
Add-On
Required
|
Add-On
Required
|
|
Office
365 E5
|
User Mode, Meeting Mode, Common Area Mode
|
Included
|
Add-On
Required
|
Add-On
Required
|
Add-On
Required
|
Note: There are various ways to get the
Add-On licences including individual or bundled licences. Speak to your local
licensing expert for more details on these.
When
talking about licensing for a Teams phone devices, in most cases a Common Area Phone licence (to be renamed to the Teams Shared Device licence) will do if it’s a phone that is out in a public space and users just need to dial PSTN numbers. The updates recently to the Common Area Phone licence that expanded capabilities (allowing Common Area Phone Premium mode) have made the supportable scenarios for common area devices even broader.
If it’s a
meeting room based device (e.g. a dedicated conference phone device) for which
you want to use the Meeting Room Mode user interface, then you must use a Meeting Room
licence (https://learn.microsoft.com/en-us/microsoftteams/rooms/rooms-licensing) or an E3-E5 licence for the device. Here I would like to note that Microsoft did announce that MTR devices will not support E3-E5 licencing as of 2023. However, it doesn't appear at this stage that this includes phone devices. With the pricing updates to the Meeting Room Pro licensing, this could end up being more expensive than you anticipated. You can use
Meeting Room Basic licences for the first 25 meeting room phones but you will
have to pair this with a Team Phone add-on licence for PSTN calling (and
potentially Azure P1 and Intune licensing if this functionality is required for your
deployment). When you run out of Teams Meeting Room Basic licences, you will
need to step up to Teams Room Pro licences (which are $40US each per month) or fall back to E3-E5 licensing. If
this is too rich for your blood, then you could choose to deploy your meeting
room phones as basic Common Area Phone devices (i.e. with the Common Area Phone user interface and Common Area Phone Licence). This would make for a lesser
user experience though, and have you trading the One-Touch meeting join button for
users having to do audio conference dial-in using the Audio Conferencing number
and Phone Conference ID for every call.
Microsoft at this point have announced that the Teams Shared Device licence update in 2023 will bring support for Teams Displays which can use this licence to connect to Teams for shared device usage: (https://techcommunity.microsoft.com/t5/microsoft-teams-blog/microsoft-inspire-2022-innovations-coming-to-teams/ba-p/3559351). It feels like Microsoft really should be considering including the Meeting Room interface scenario for phone device with the new Teams Shared Device licence as well... However, there is nothing confirming this at the moment. Until further information comes to light we will have to hold our breath on this one. When more information becomes available, I will be back to update this post... Stay tuned.
Update 16/11/2022: According to a response from Microsoft on their latest post on Tech Community about the Shared Device Licence, it will not be supporting one touch join (i.e. I take this to mean the Meeting Room UI experience). Comment: "One touch meeting join will be available only with Microsoft Teams Rooms licenses. It will not be supported on the Teams Shared Device license."
The Wrap Up
Hopefully that has given
you some insights into what configuration and licensing you need to achieve
your desired Teams Phone outcomes! If you have any comments or corrections, feel free to
send them through. I plan to keep this post up to date with information on the new Teams Shared Device licence, so check back later for updates or follow me on Twitter to stay in the know.

 0
comments
0
comments