

There are several ways to get the Teams PowerShell module to
authenticate against Azure in order to get access to running Teams PowerShell
in your Tenancy. Most people will be used to using the
interactive method, where you just run the basic Connect-MicrosoftTeams command
and get an interactive Azure auth screen that pops up and you enter your user
account details into. This is fine if you are manually connecting and doing
this by hand. However, what if you want to run an Azure Function that needs to
authenticate automatically each time it executes? Well, for that you want to
use an application authentication method.
Currently as of the module version 4.9.1, Microsoft
officially supports two methods for application authentication when connecting
to the Teams PowerShell module:
- Certificate based authentication – In this method you have a certificate with private and public keys. The PC connecting to Azure needs to have a copy of the private key and Azure needs to have a stored copy of the public key. As part of the connection the private key will be used to sign the connection and if Azure can decrypt the information with the public key then the PC is trusted to connect. This essentially makes the private key like a password that you need to ensure that no one else has access to.
- Token based authentication – The token-based method requires that you set up a Client Secret in Azure. When you connect to Azure using the PowerShell module, you authenticate against the Token Service using the Client Secret and get Tokens back that you can use to connect to the service. In the case of the Teams module, you need to get two tokens to be able to run all the commands. You can find out more about this option here: Token Auth Post
In this post we are going to focus on the certificate-based
authentication method. Here are the steps for setting up and connecting using certificate-based
authentication:
Step 1: Generate a Certificate:
The good news here is that the certificate you need does not
need to be signed by an internet-based Certificate Authority. You
can simply create a self-signed certificate on a PC and use this for
connection. Below is a PowerShell command you can run (you must run the
PowerShell window as Administrator to execute it). The most important flag in
the command is the KeySpec flag which tells it to generate a certificate that
can be used for Key Exchange.
New-SelfSignedCertificate
-certstorelocation cert:\localmachine\my -Subject TeamsAppTestCertificate01 -KeySpec
KeyExchange
Step 2: Export the Certificate:
In order to export the certificate you can either run
PowerShell or do it by hand with the Certificate Snap-in. Both options will be detailed below. Choose the one that you’re most comfortable with.
Export the Private Key (This step is only needed if you want to run PowerShell from a different machine that you have created the certificate on, for example, a Function App, etc):
PowerShell:
$password =
ConvertTo-SecureString -String "SpecialPassword123!" -Force –AsPlainText
Export-PfxCertificate -Cert "cert:\LocalMachine\My\8E4CKSHDUSG873F66D99AC7935F53" -FilePath "C:\temp\AuthPrivateKey.pfx" -Password $password
Note: The thumbprint to be used here will
be output from the New-SelfSignedCertificate command you previously ran.
Or Windows UI:
Once again, this is is only needed if you want to run PowerShell from a different machine that you have created the certificate on, for example, a Function App, etc.
Search PC for mmc.exe > File Menu > Add or Remove
Snap-in > Certificates > Add > Computer Account > Personal >
Certificates Folder > Right Click on the Certificate > Export…
Export Certificate Wizard:
Click Next...

Select: "Yes, export the private key":


Enter a name and location for the pfx file to be output to:

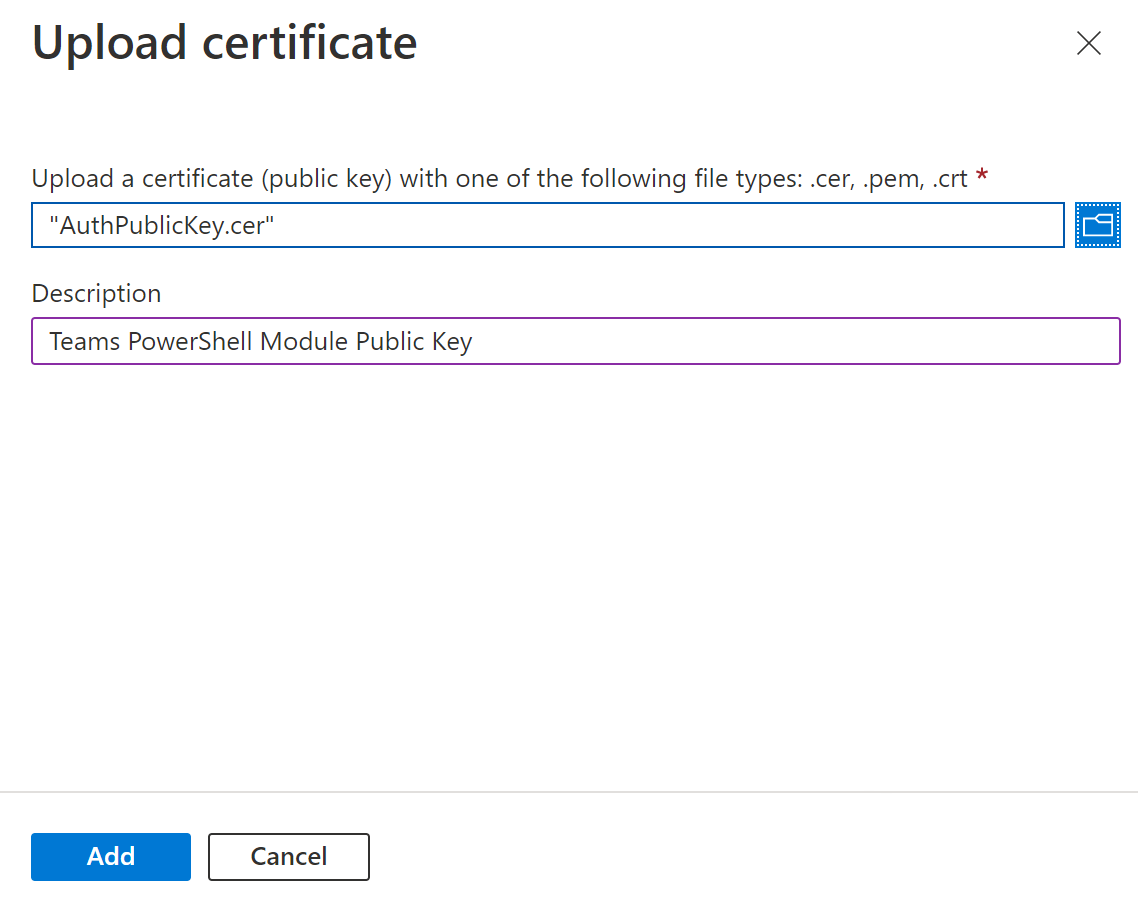
Export the Public Key (to be uploaded to the App Registration in Azure)
PowerShell:
Export-Certificate
-Cert "Cert:\LocalMachine\My\8E4CKSHDUSG873F66D99AC7935F53" -FilePath "C:\temp\AuthPublicKey.cer"
Or Windows UI:
Click Next...


Select the format of the file (DER is okay in this case) and click next:


Step 3: Configure the App Registration:
Open the Azure AD Portal and select the Azure Active
Directory > App Registration section:

Fill in a name for the application and click the Register button:

The App Registration will now be created, however, there is still more config to do:
Go to the “Certificates & secrets” blade:


Now open the API Permissions tab within the App Registration, Click "Add a permission":

You will need to add the following Graph API permissions to the App Registration:
User.Read.All
Group.ReadWrite.All
AppCatalog.ReadWrite.All
TeamSettings.ReadWrite.All
Channel.Delete.All
ChannelSettings.ReadWrite.All
ChannelMember.ReadWrite.All
These permissions are documented by Microsoft here, so you may want to check to see if there have been any updates for the PowerShell version you're using: https://learn.microsoft.com/en-us/microsoftteams/teams-powershell-application-authentication
Click the "Microsoft Graph" option:


Ensure that you have added all the permissions. If you missed any then repeat the above steps for all the permissions in the list…
After adding all the permissions, you need to click the “Grant
admin consent for <tenant id>” button on the main Permissions screen:

At the end of this procedure, you should have the following permissions all assigned with admin consent granted:

In a final twist in this adventure, you also need to make sure you assign Teams Administrator privileges to the App Registration in order for it to be able to run CS commands. You do this by going to the Active Directory tab > Roles and Administrators > Teams Administrator Role:

Assign the Service Permission that is named the same as your App Registration to the RBAC Role:

Connecting To Teams PowerShell
Now that all the backend work has been done we can get down
to doing some connecting. When you connect it needs to be from a machine that has
access to the certificate. On a PC this means it has to be in the certificate
store. If it’s from a machine in Azure there are various methods for doing
this too (which I may well get to in another post…).
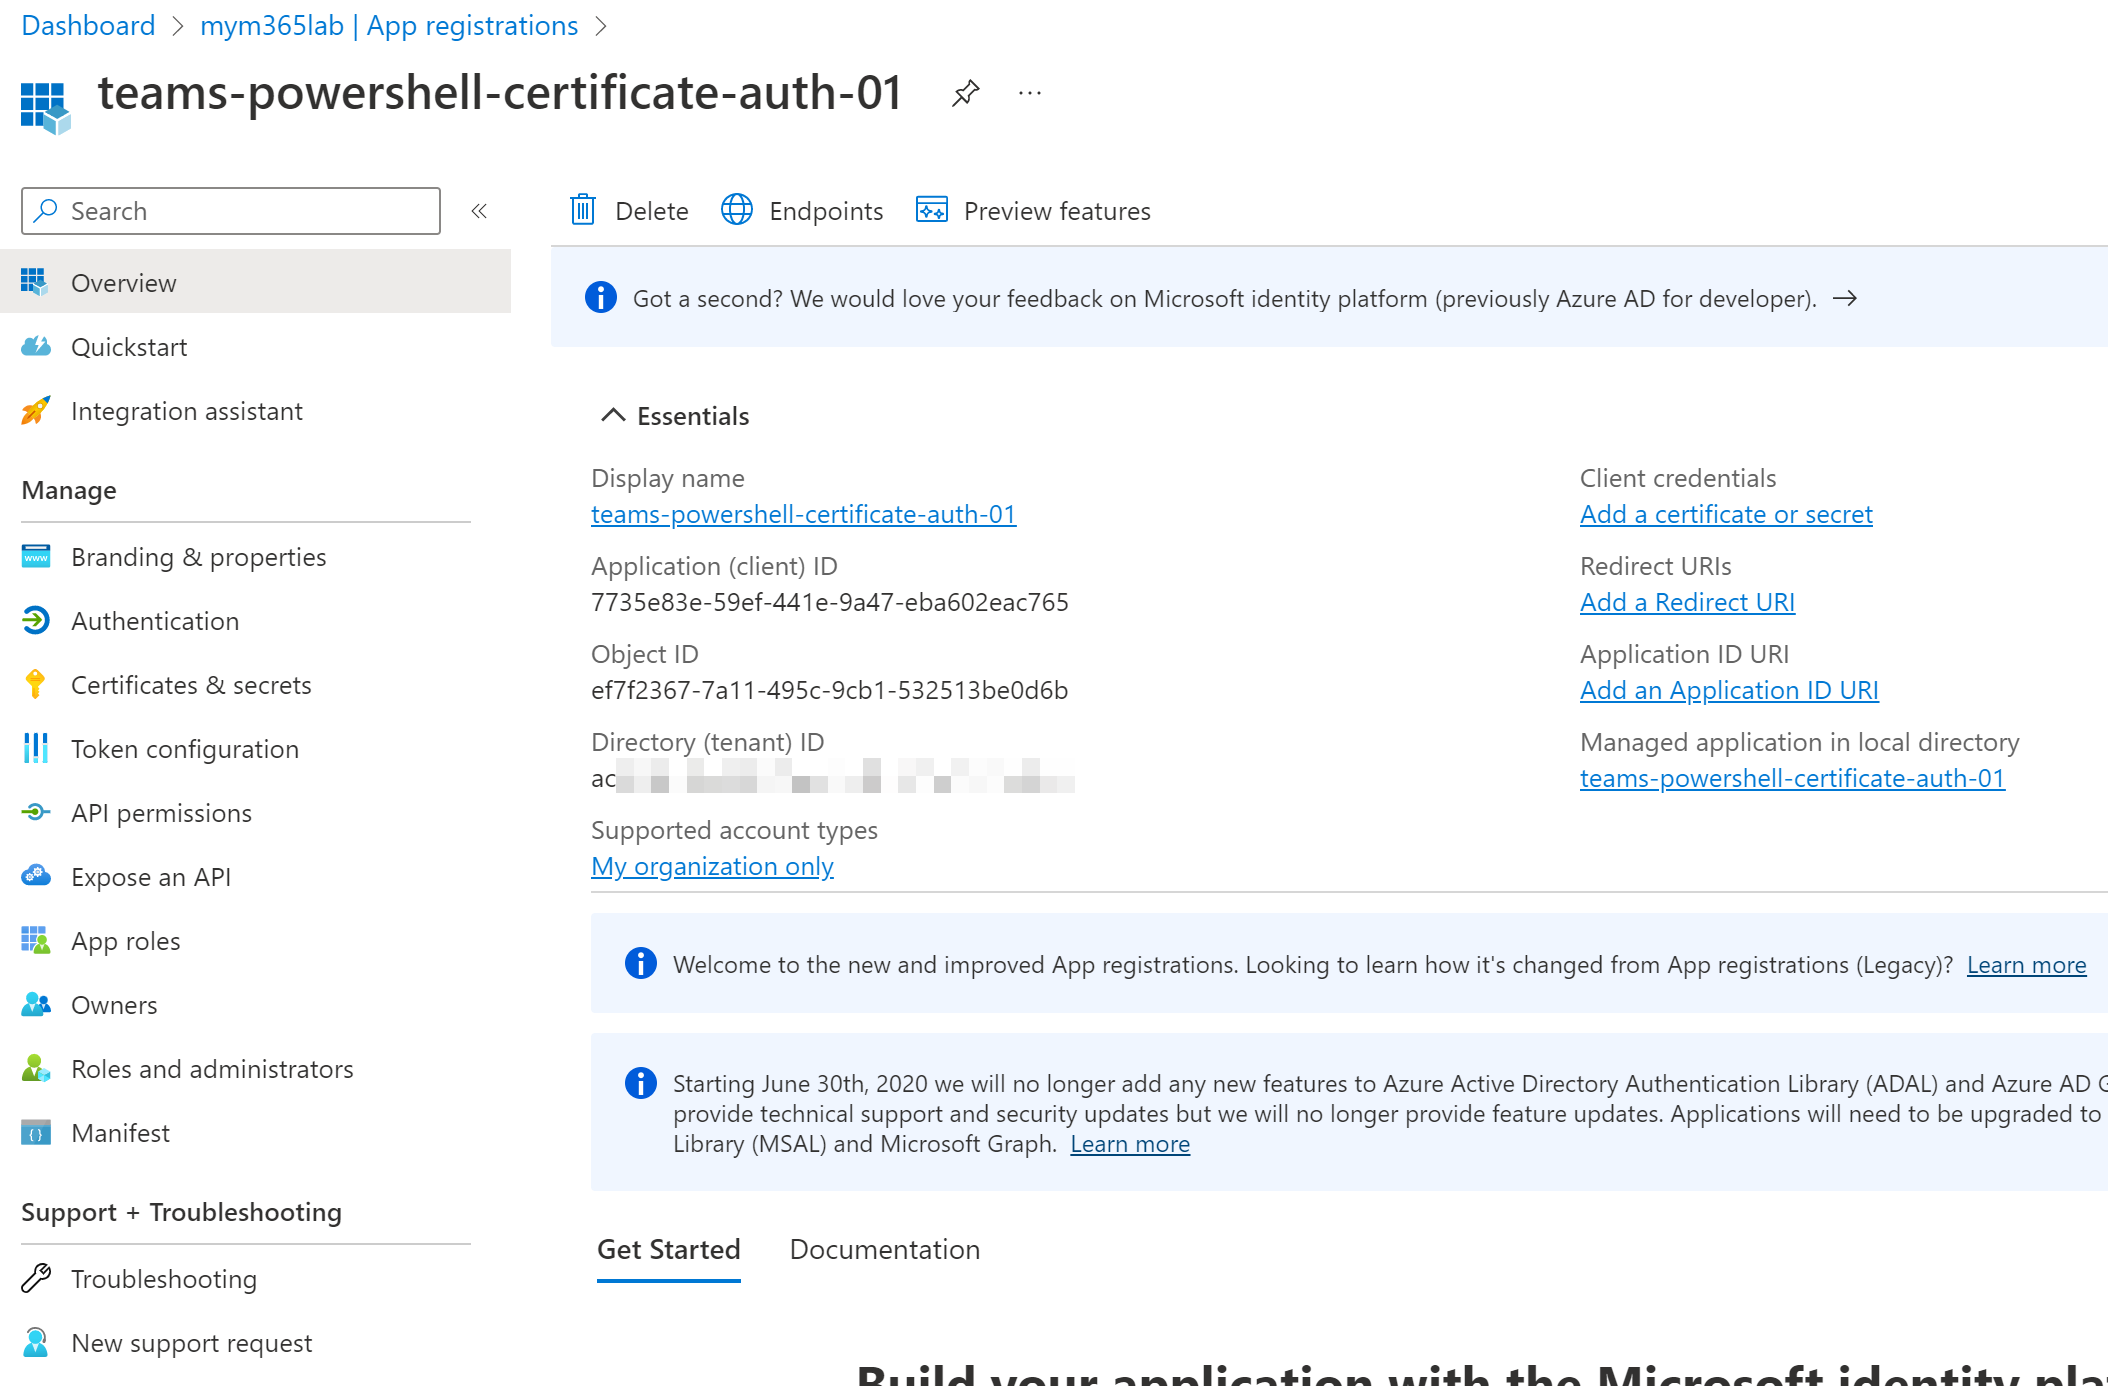
You will need to know the ApplicationId that was given to
the App Registration in Azure. You can find this out by looking going to the
Overview tab and looking for the GUID that has the title “Application (client)
ID”. The TenantId is the base domain name that was first given to your tenancy
when it was created or alternatively can be the GUID that’s in the Overview tab
named as “Directory (tenant) ID” (both options will work).
Teams Module Connect Command:
Connect-MicrosoftTeams -CertificateThumbprint
"3ab0e057bc3278ecb2a33123042e5a7a8001ff8c" -ApplicationId "319d0a47-9a48-45b0-b416-14aca00e7ece"
-TenantId contoso.onmicrosoft.com
When connection is successful, you’ll get back an object
displayed in the PowerShell window that tells you the Account, Environment,
Tenant and TenantId values. From here you should be able to run almost all of
the commands from the module, with the following exclusions:
As of 4.9.1; All cmdlets are supported
now, except for the cmdlets mentioned below:
- New-Team
- [Get|Set|New|Sync]-CsOnlineApplicationInstance
- *-CsUserCallingSettings
- *-CsUserCallingDelegate
- *PolicyPackage*
- *-CsTeamsShiftsConnection*
- *-CsBatchTeamsDeployment*
The Wrap Up
Congratulations, you’re now an expert at certificate-based authentication with the Teams PowerShell module. If you are interested in Token Based Authentication using the Teams Module, then you can check out my post on that over here: Token Auth Post.


